Gorgeous Planters For the Price of a Cup of Coffee

Don’t Throw Those Plastic Pots Away!!
See a pot on the side of the road? Pick it up!! Give yourself unlimited access to beautiful outdoor flowerpots and chic indoor planters WITH THE RENEWING POWER OF CREATIVITY & SPRAY PAINT
This is one of my favorite projects and posts!
It has all the ingredients: recycle reduce reuse, shoe-string budget, sustainable-savvy-living! Eco-friendly alternatives!
Grab those plastic pots before they go to the dump!

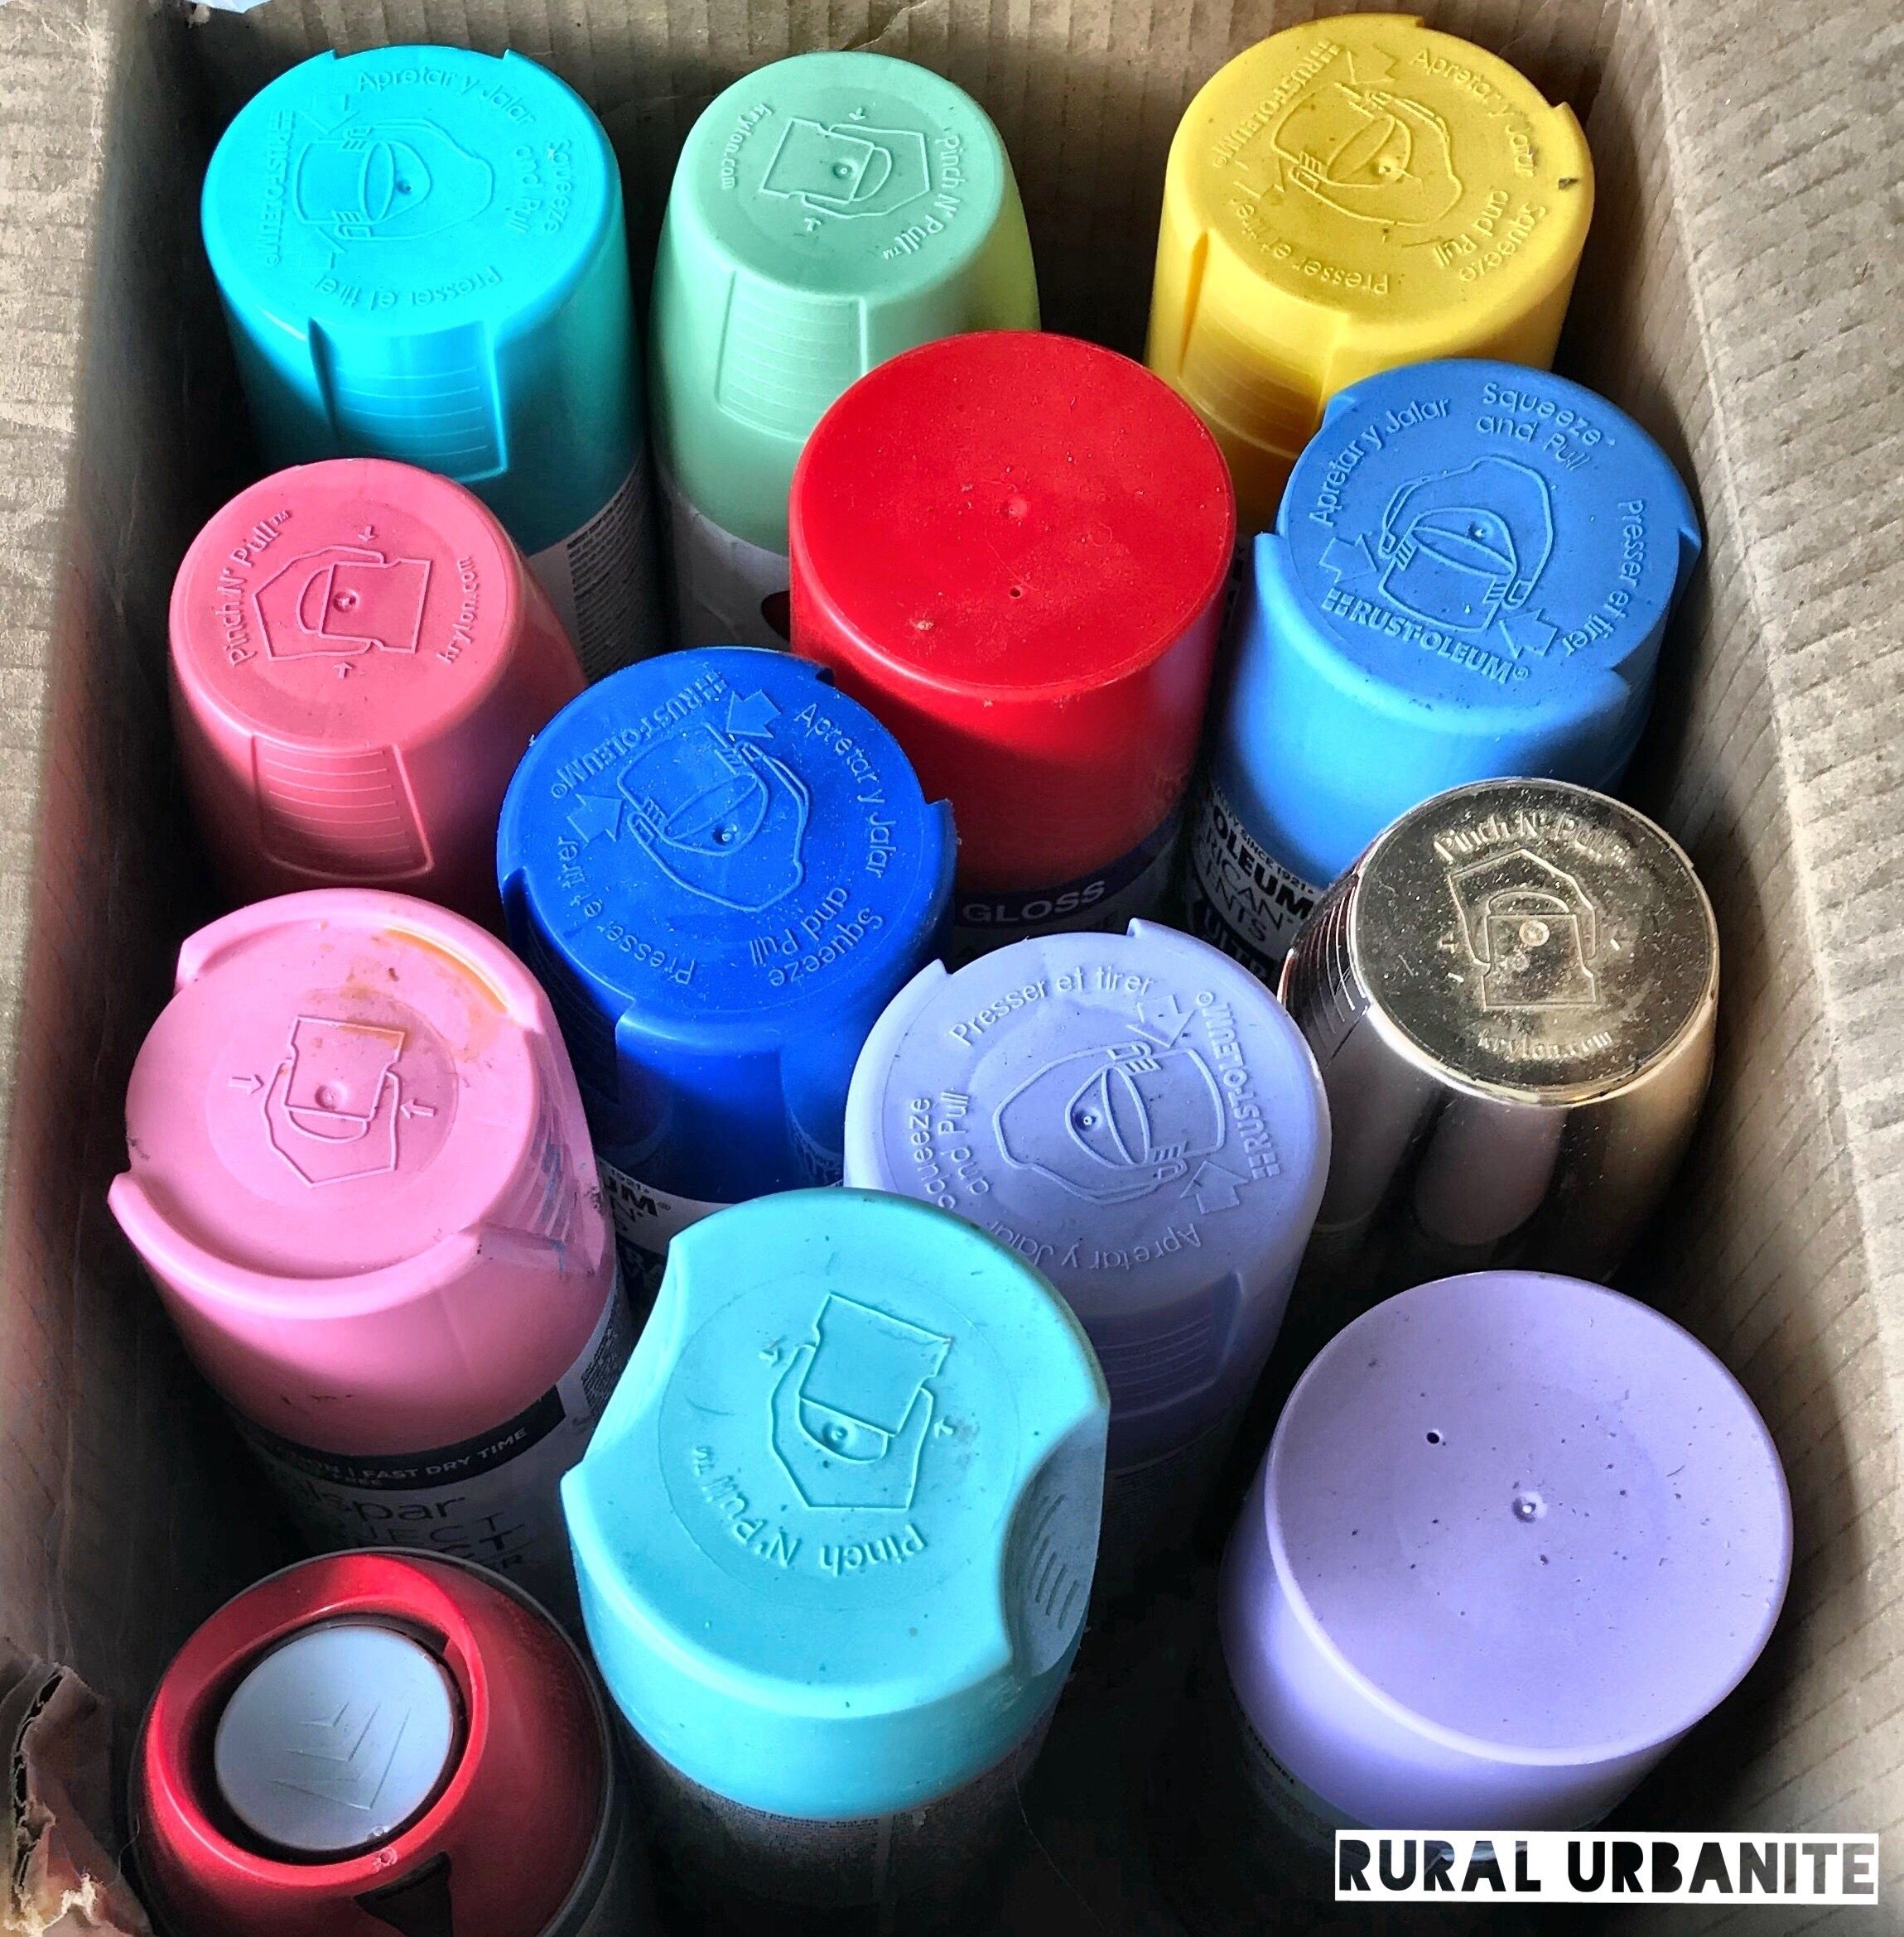
My Lucky Stars! I just came across a JACKPOT TREASURE TROVE of planters. Those long green ones seen in the pile were HUMONGOUS window box planters! Look at the wire baskets! Terra Cotta! Sturdy Plastic! I WANT IT ALL BABAY!! (if curious: i wasn’t able to get all of that, including the window planters)
I’ve collected hoards of sturdy black plastic nursery pots from street-side trash piles. Sometimes I feel spoiled and guilty! I have beautiful shiny bright red planters with cute ladybugs, and of course the classic deep blues, and everything in between—including a modern chic, pink and gold pot—it is less my personal style, but it is so pretty and was fun to make. That pot will be part of a gift; it will hold a growing cutting of one of my plants.
This Gift Is Always A Winner And It Costs Almost Nothing!
Your friends are so delighted to get their very own blueberry plant, or spider plant (one of the easiest to propagate), or any on-trend easy-care indoor-friendly succulent! And its already in a beautiful container! THAT YOU MADE! It’s great!
the plant is basically free—a cutting of your plant (or purchase one if needed)
the flowerpot IS free
the spray paint will cost an average of $1.50 to $4.85, depending on where you live and where you get your supplies
Their new gift is of a plant came from your plant—that’s super cool, and its kind of a sweet bond. You “made,” you designed the decorative planter the plant is presented in!? GASP!
This gift is so unique and thoughtful! and its monetary value is the equal opposite of its sentimental value! it costs almost nothing, but it means a whole lot! YAY!
Following the proper steps to spray painting a planter pot is IMPERATIVE for desired and lasting results. You can’t skip or skim any of it. I’ve tried, multiple times 😆.
The super important steps: spray painting a plastic pot:
1. Clean and Prepare Your Pots—Soak them in bleach and water. Rinse well. Then give them a good scrubbing with dish soap and preferably warm or hot water. Rinse well. Air dry. Get them looking as good as new; repeating any steps you might need to repeat.
For Preparation, some suggest scrubbing the planter a little bit with sandpaper so that those little nicks and scrapes pick up & adhere to the paint better. (This step is not necessary)
2. Find A Nice Place to Paint—Preferably outside. Preferably low wind and good sunlight, or light. If you have a carport, or a well ventilated garage, or shed; even better.
Also, cardboard boxes, newspaper, and similar items are EXTREMELY helpful and useful in all spray painting endeavors. They provide a surface on which it’s okay to spill paint. And they protect your sprays of paint from being carried away by the wind (super frustrating). The cardboard box “shelter” also protects your item from being hit by wind, which usually carries some sand or dust (ruined project) or can knock your pot over while it’s wet, usually screwing everything up.
3. Personal Protective Gear—Wear gloves, any gloves. And it is recommended by health authorities to wear a mask. Whenever I do not wear a mask, I can feel it, and i don’t like it. It DOES feel like you have inhaled particulates of spray paint. Sometimes you even have colorful nose boogies! No, that’s not a good sign. If you don’t have a good mask, and don’t want to buy a cheap mask; tying cloth, a t-shirt, a bandana, something, around your mouth and nose is important; this stuff kills brain cells, you know? Gloves+Mask
Time To Paint!
4. Begin w Primer:
Apply a spray-paint primer, preferably one made for plastic or difficult surfaces—this step you CANNOT CANNOT SKIP. I have tried, and wind up with paint flaking off of the pots in no time. I have to re-paint the entire thing for an even coat. Its a huge waste of resources, all in the name of saving time, and I end up spending way more time and way more supplies. DON’T SKIP THE PRIMER.
To apply the primer:
Often, the directions are on the can. Shake the can sufficiently. Stand a good distance from the pot. Spray a few inches away from the pot. Spray in a sweeping, back and forth, motion. You do not keep your finger pressed on the can; this will ruin it quickly. Press on, sweep, let go. Very peaceful. It’s better to spray too lightly than too heavy; you can always add more, but ya cant reverse the process. Too much paint leaves splotches, and runs of paint down the planter (if you’re going for that look, then definitely over-spray your can of paint, or spray it too closely—the PAINT! not the primer)
Let the coat of primer dry completely. The time for this can range significantly, from 2 hours to 24. Some newer ones are faster. Apply second coat of primer. Again, let this dry completely. Wait until the next day to apply your paint for best results—keyword: Best Results—you don’t HAVE to wait this long...unless you want the best results 😁
5. Time For The Spray Paint!
This is the fun part. Time to let your creativity unleash itself! Even if you just use one solid color for the entire project, the results are awesome! I’ve done this countless times; especially in projects where continuity was key. Even just making a shiny blue pot brings sincere satisfaction.
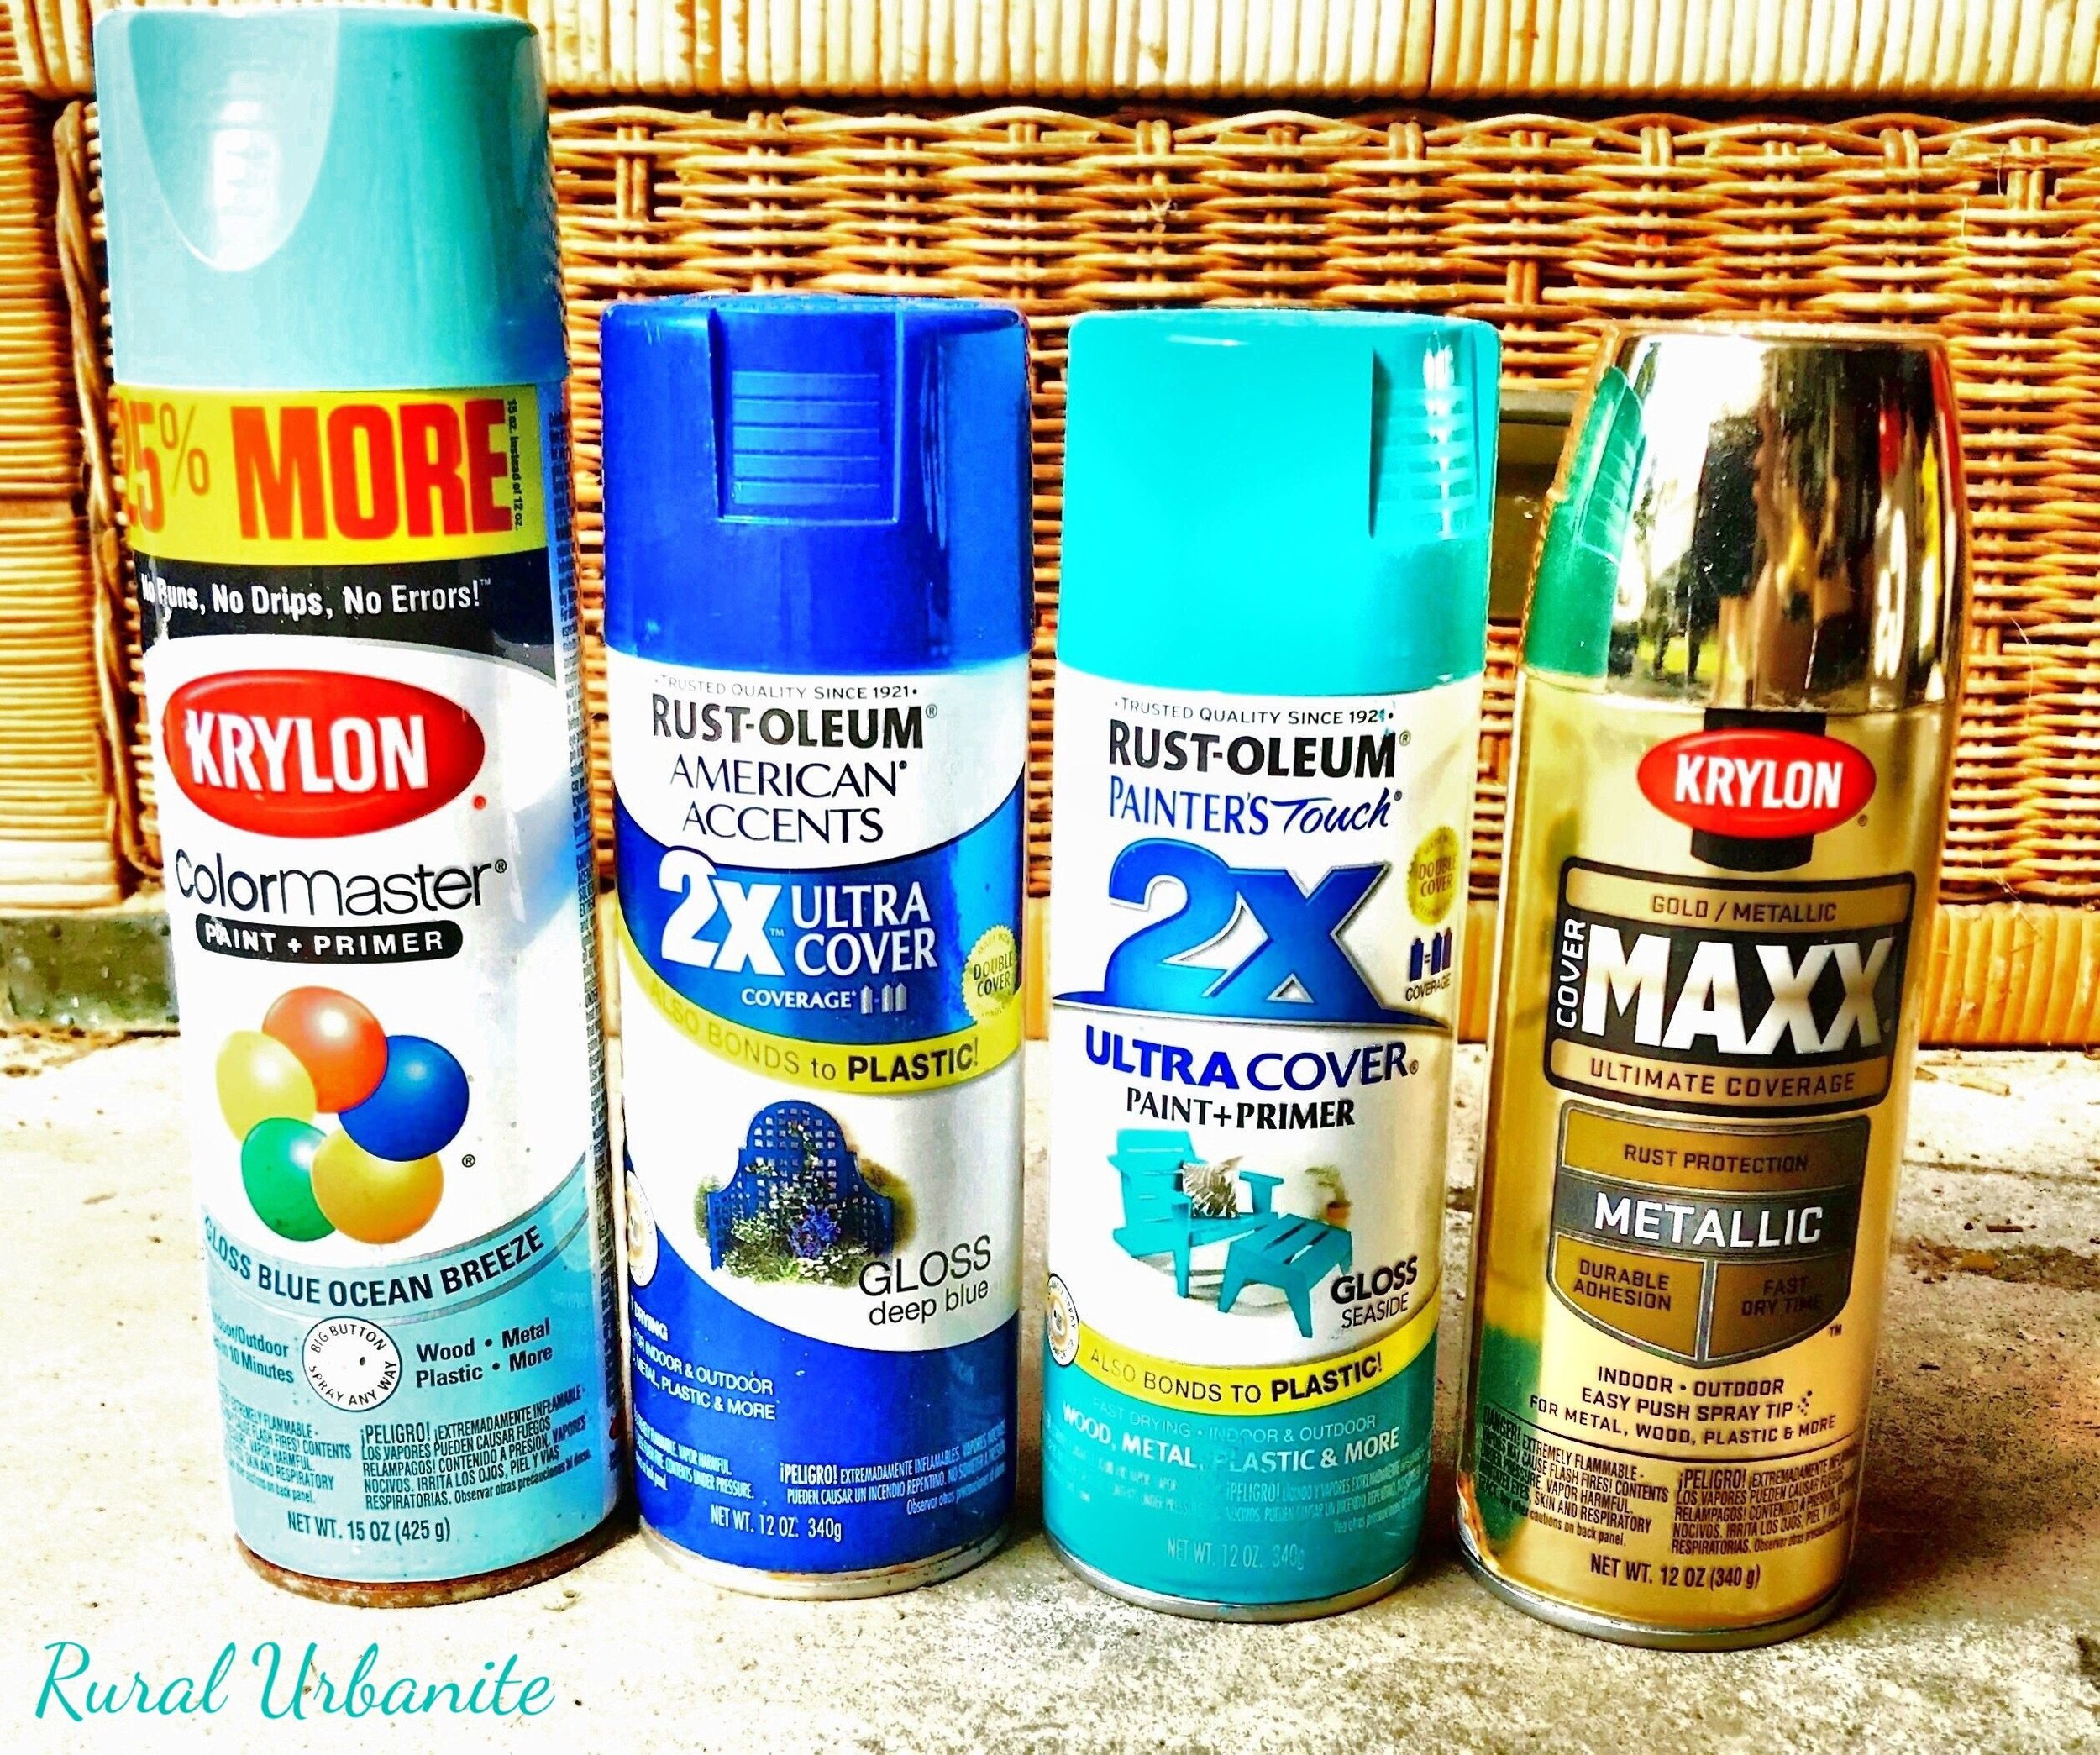
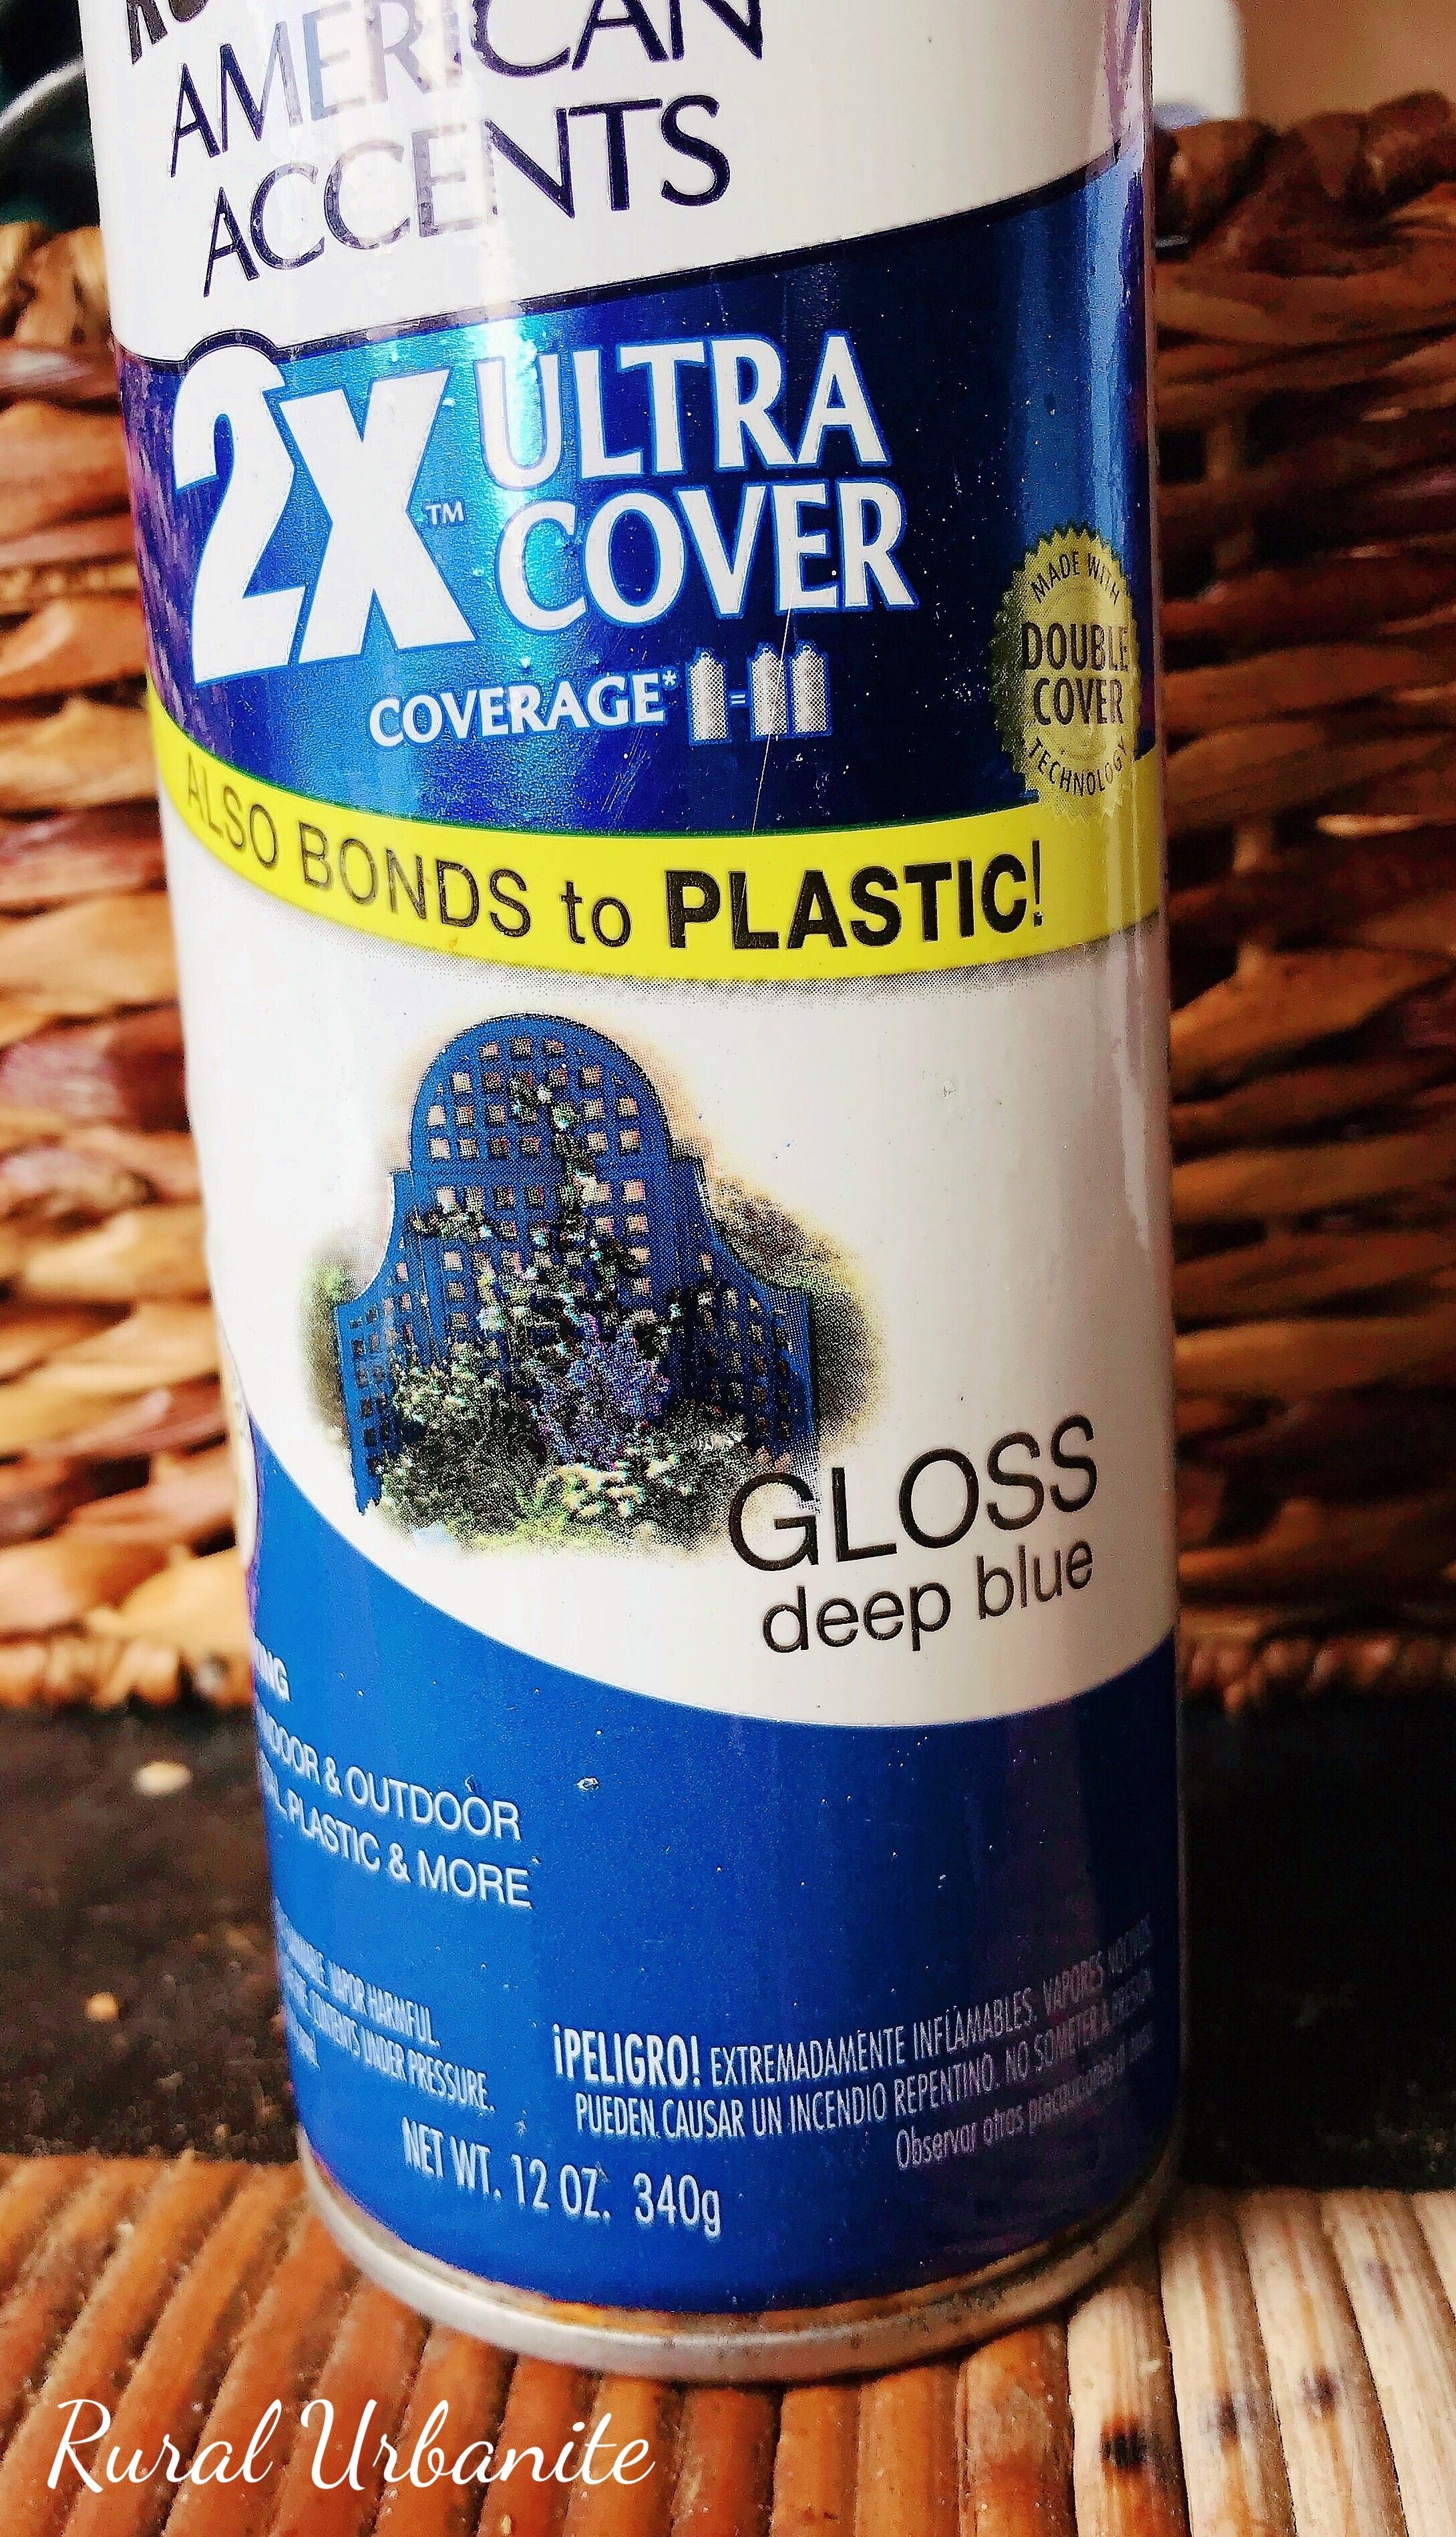
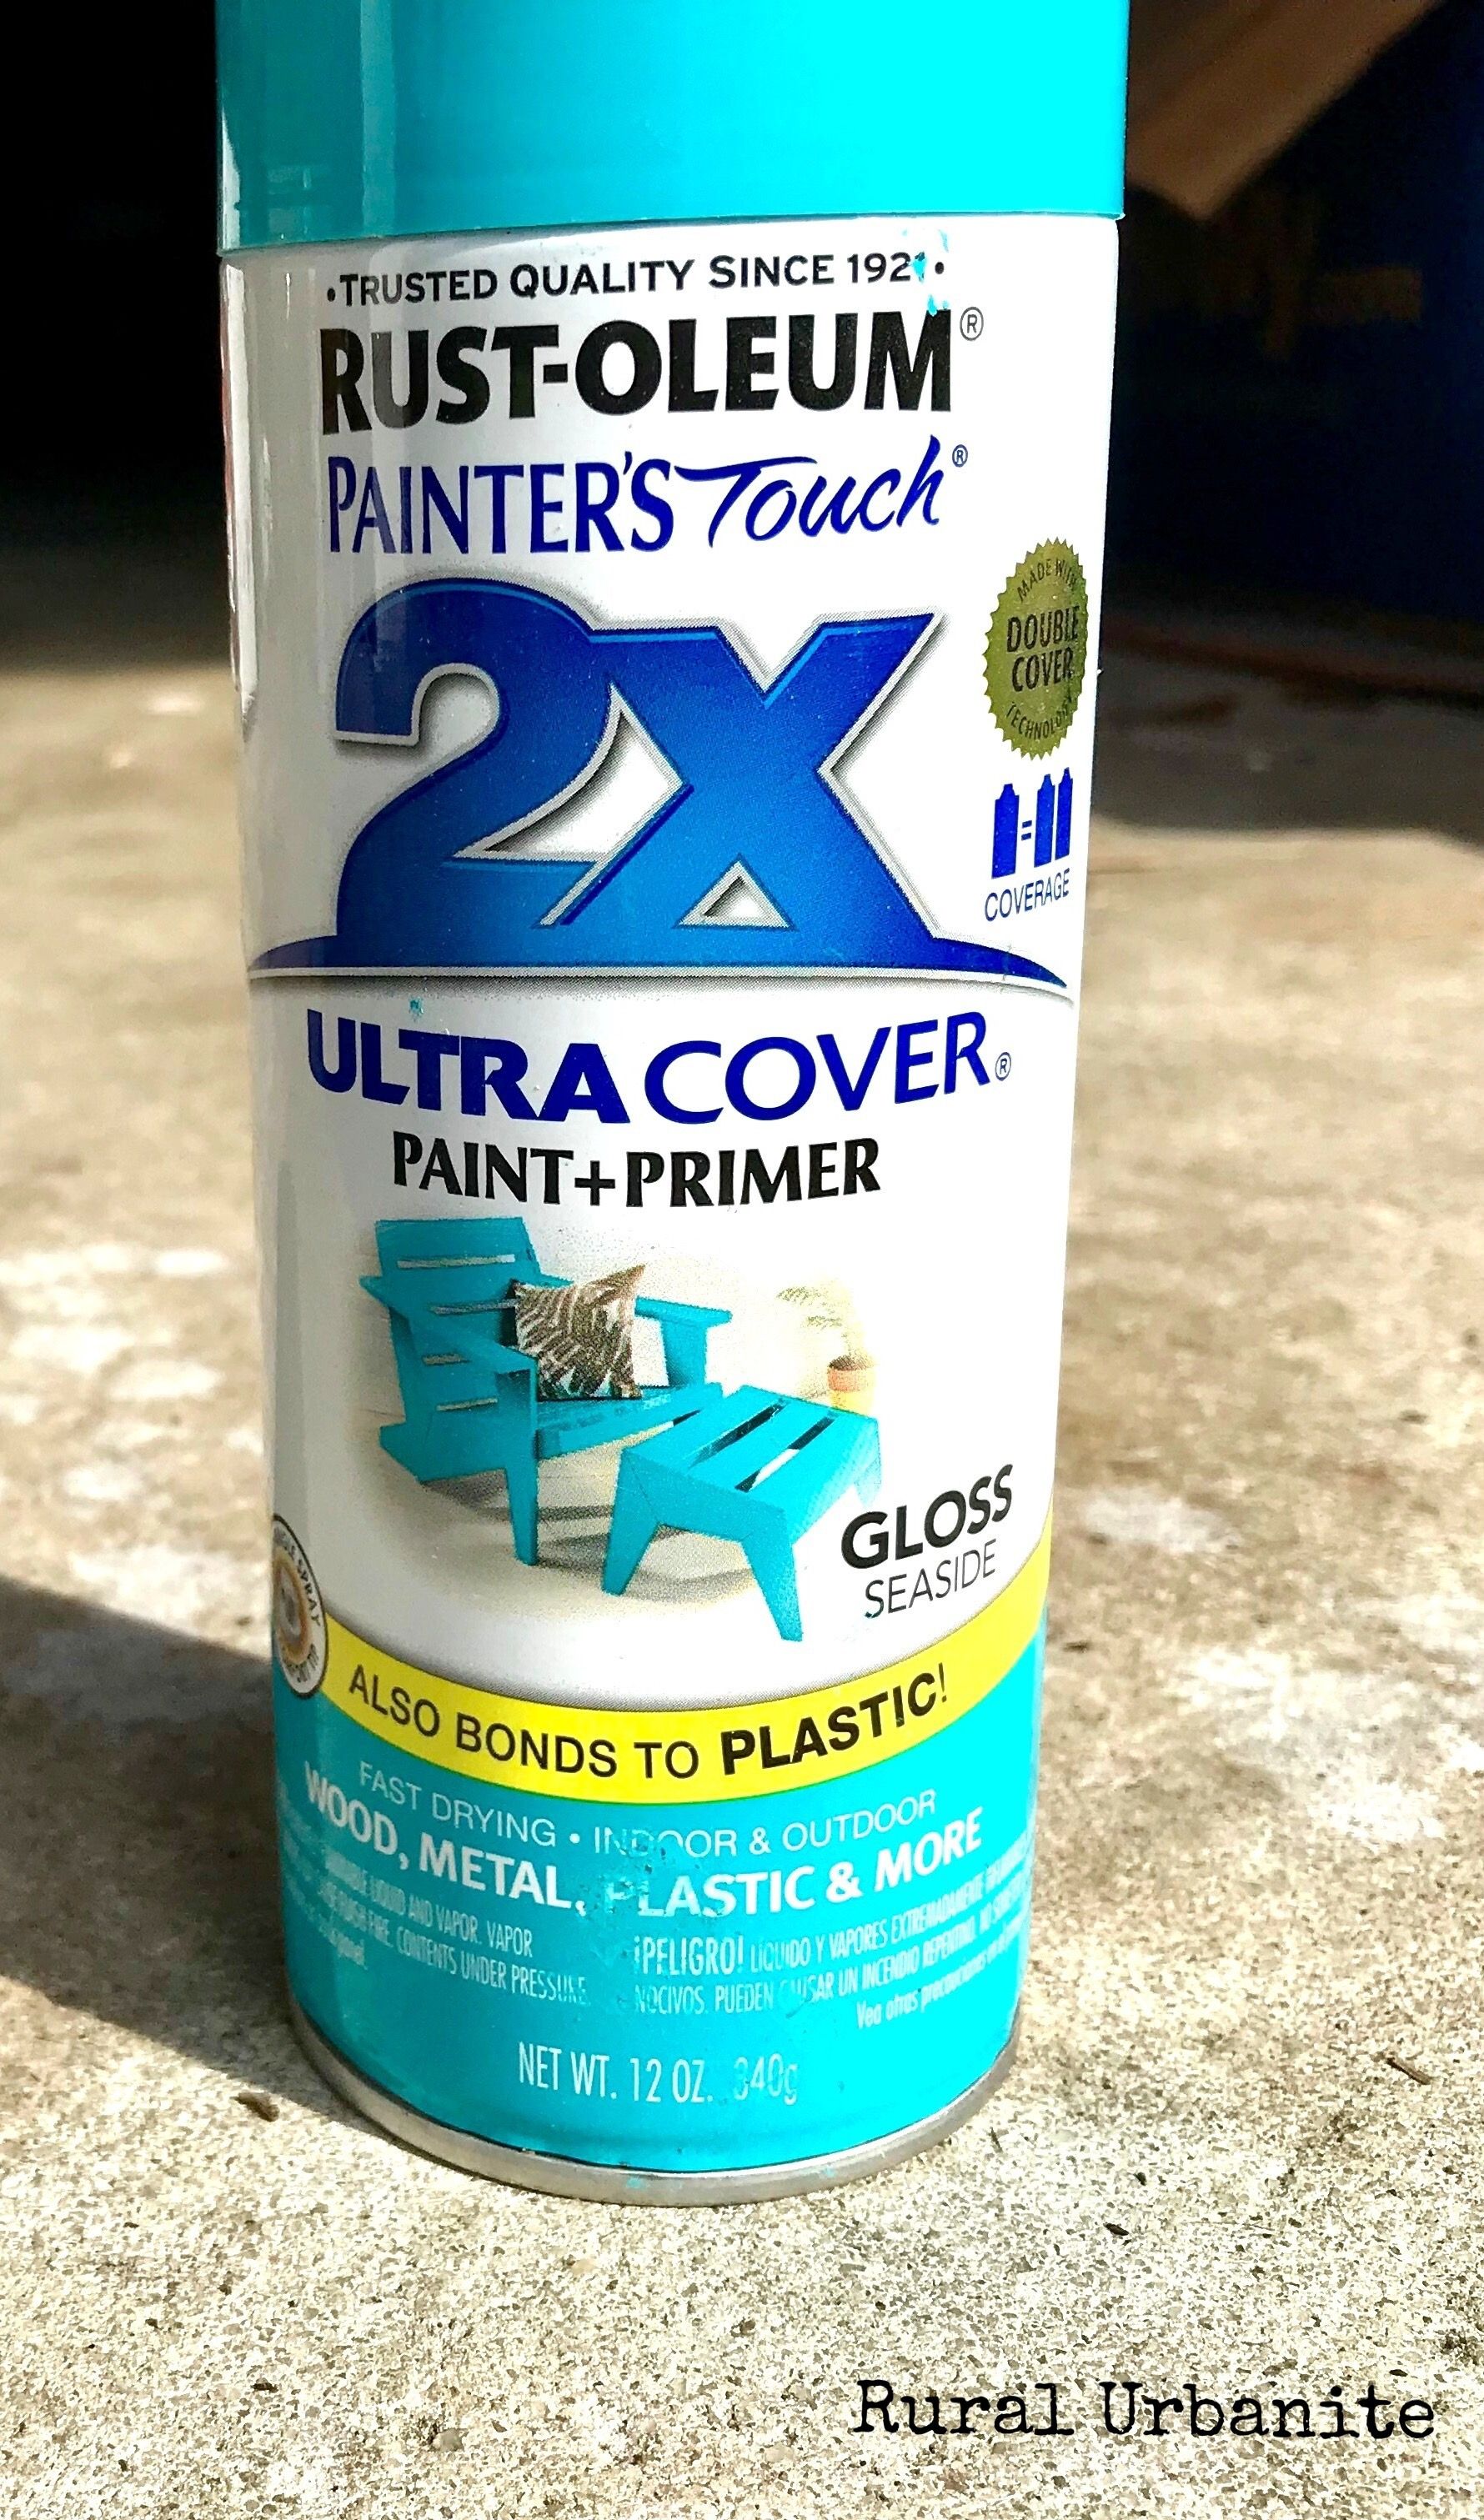
What Kind of Spray Paint is Best?
Outdoor Grade/Made For Plastic/High-Gloss
This is a tough, all around bad-ass can of paint. These qualities are going to get you the best results. That being said! They are not necessary for the success of the project; especially if the pot is intended to stay indoors.
Call-back to all these steps; for real; if you use a good primer; if you apply the primer properly; if you clean the pot thoroughly before spraying it—all of these factors culminate to make a BIG difference over how successful the project will be
High Gloss Paint is Majorly Preferred in this Particular Project. Otherwise, the pot runs the risk of falling flat and looking like a dull nursery pot all over again, yet worse= now with some weird different coloring, as if the garden company tried to stand out from the competition. With gross ill-conceived nursery pots. hahahaha!
Applying Your Paint—Same steps as the primer. Detailed directions will most likely be on the “back” of the can.
Shake your can.
Apply your coats of pain gently but firmly (if you press too gently, the can might “spit” paint (no bueno!))
***Let each coat of paint dry completely before adding another, this is a crucial step.***
Repeat the process until you are satisfied with your product.
Be careful to not let any debris, pollen, sand, etc, make contact with your wet planter.
6. The Finish—Sealer or Topcoat:
This coat typically comes in clear, no color. Instead of color choices, it varies in opacity: matte, satin, gloss, etc. Some are made to create an effect of cloudy glass. Some are made to be totally invisible and somehow blend with the sheen/shine of the object. It is available in just as many specific variations as the primer or the paint.
Think of the primer as the base.
The paint as the color/art.
And the top coat as the sealer that keeps everything together.
High-Gloss or Gloss is Highly Recommended. Its the perfect finishing touch, adding extra shine that makes the planter look brand new. Best of all, it contributes seriously to the lifespan of your project.
Use Outdoor-Grade Sealer (unless you know the planter is going to be indoors). Choose a nice, trusty, strong, anti-yellowing, clear sealer. Choose whatever level of sheen you would like. Keep in mind, High-Gloss or Gloss is recommended for this project.
Apply the sealant/topcoat to your pot according to the directions on the can. Each product varies with application instructions. It will likely be very similar to the primer and the paint.
It can be difficult to tell if/when you’ve got the whole planter covered. Try your best, and go ahead and over-apply/saturate it if you need to.
It’s often best to apply a coat in multiple sittings in between drying sessions. This way, you can lay the planter on its side and thoroughly paint, prime, or seal it.
—Meaning, you don’t have to paint the entire pot at once
—Try spray-painting one side. Let it dry. Now you can lie the pot on its side and spray it with much more accuracy
Leave A Comment! Its at the bottom of the page:
PLEASE SEND COMMENTS AND PHOTOS OF YOUR SPRAY PAINTED POTS AND PLANTERS! IT IS ONE OF MY FAVORITE THINGS! THANKS AGAIN! SEE YOU NEXT TIME! -ASH
The Primers I Use. The Best Primers For This Project.

The Primers i use. The Best Primers for this Project.
MY Spray Paints! HIGHLY RECOMMENDED!